
Automated Deployment of Laravel App Using DeployBot and Cloudways
Deployment tools smoothen the process of software and update distribution. By using tools for scheduling or automation, developers can stay centered on the crux of their assignments. It becomes easier to collaborate on projects, track advancements, and manage changes.
Most service providers offer you with everything you need for continuous integration, and for sending to testing. Deployment tools simplify rolling back tricky releases or configurations until you can rectify any problems. One commonly used deployment tool is DeployBot, which lets you execute or compile code on servers through predefined or custom Docker containers.
This article will show you how to use DeployBot to configure and deploy a Laravel web app to managed cloud hosting provider Cloudways with zero downtime. We’ll demonstrate this by hosting a Laravel project, but the same process can be used on any other PHP web application, whether you are using the same framework or not.
Installing Laravel 8 on a Cloudways Server
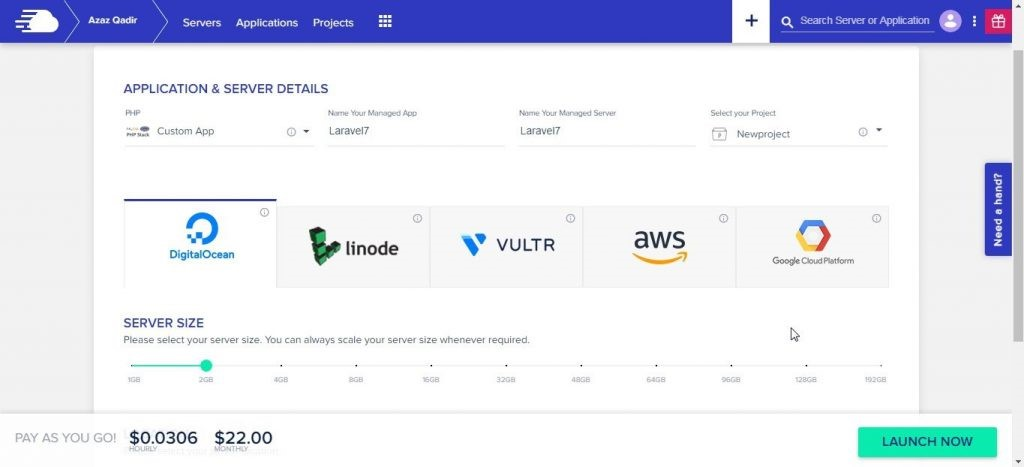
Cloudways users can choose between one of five major cloud providers to host their servers.

To install Laravel 8 on your server, select your preferred cloud provider and application according to your project requirements. Select the Laravel server size as per your website traffic, and location according to your preferred region.
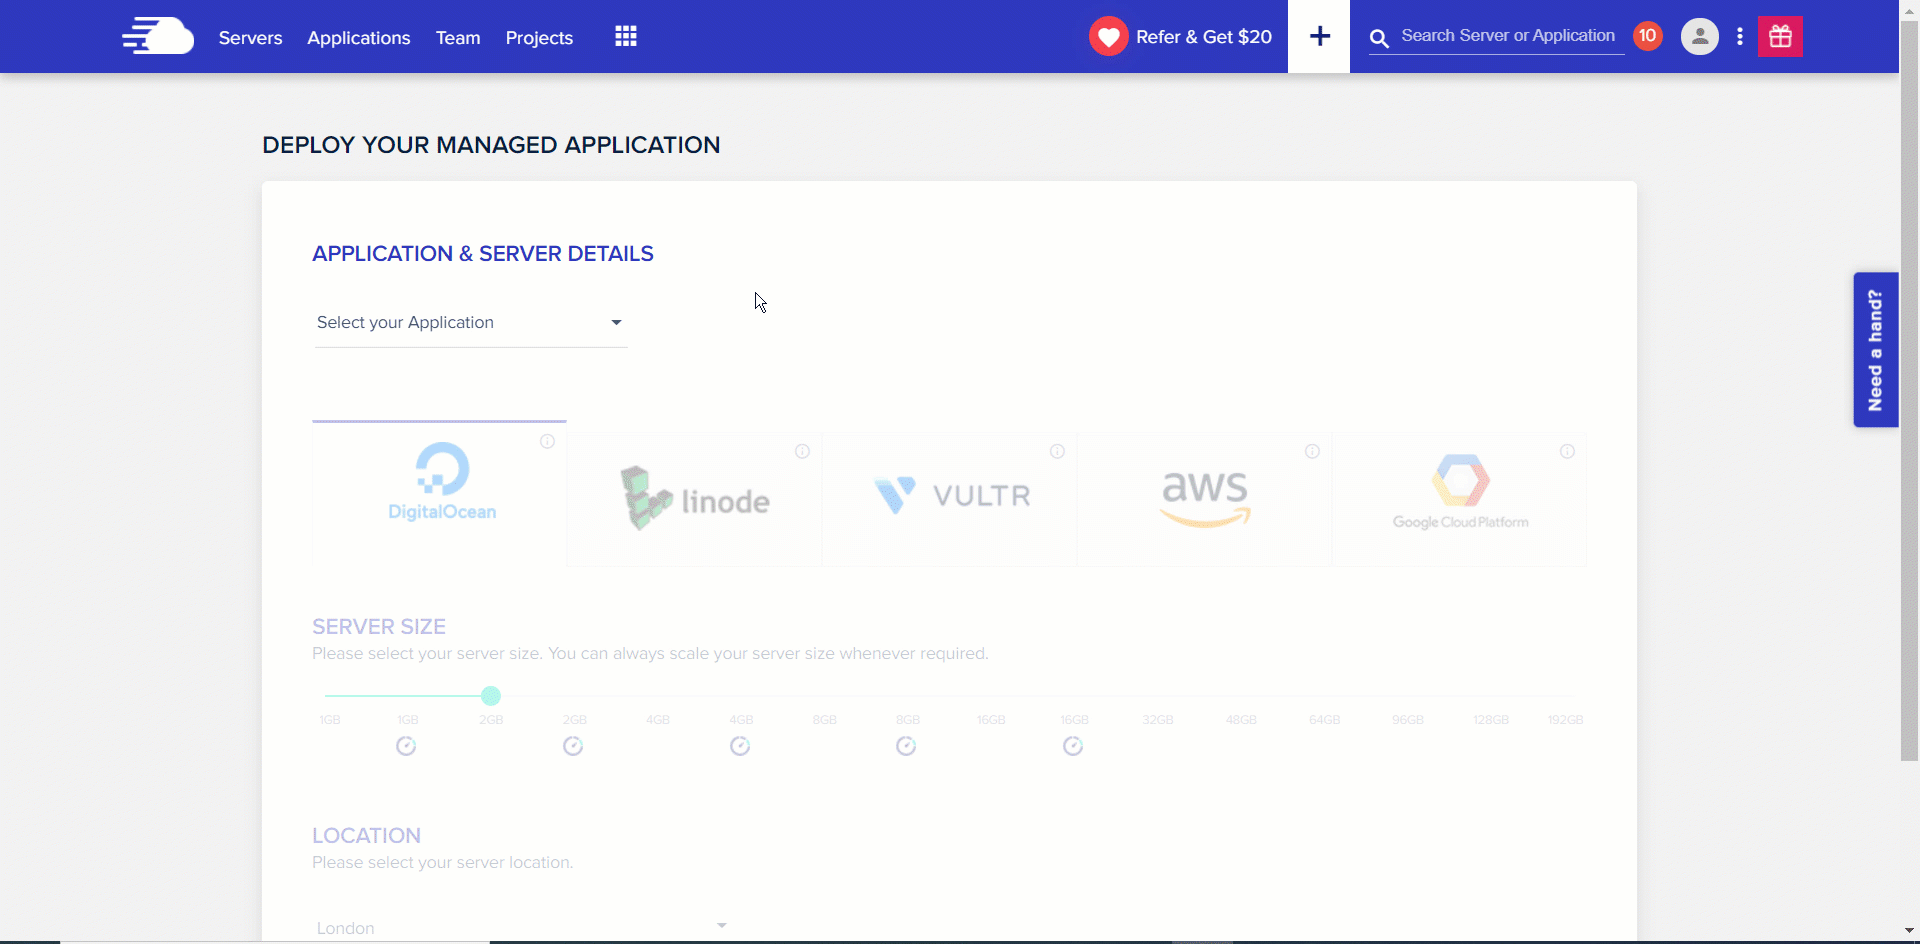
Click LAUNCH SERVER, and wait for a few minutes before your Laravel 8 Application is deployed on optimized conditions.
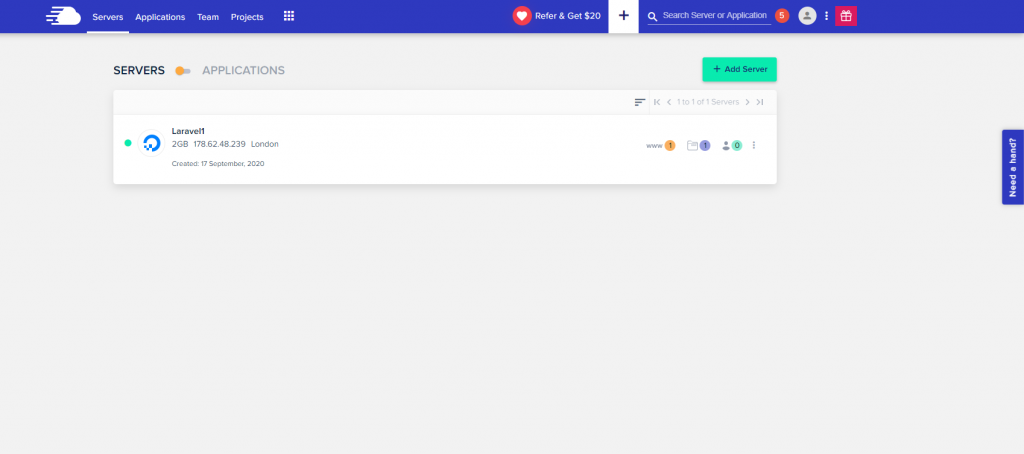
Once the process finishes, go to your application staging URL, where you will see the following Laravel page.
If you see the above screen, Laravel has been successfully installed on your Cloudways server.
Install Other Versions of Laravel on the Cloudways Server
To install other Laravel versions, click on Custom App from the app dropdown, and select your version.
After completing all these steps, you can navigate to the application tab and select the application. Click on it to find further details inside:
To initiate the Laravel installation process on the server, open the SSH terminal to run the composer command. You can either use the Putty terminal or the Cloudways SSH terminal.
Let’s start with Putty: go to the application public_html folder and type the following Laravel installation command:
composer create-project --prefer-dist laravel/laravel portfolio

Now go to your application path: APPLICATION-URL/laravel/public, which will show you this:
Setting up the Cloudways Server with DeployBot
To execute the process, your codebase should be managed in a git repo.
Set up your server
DeployBot does not provision your server for you. It expects the server to be built already.
Connect your GitHub repository
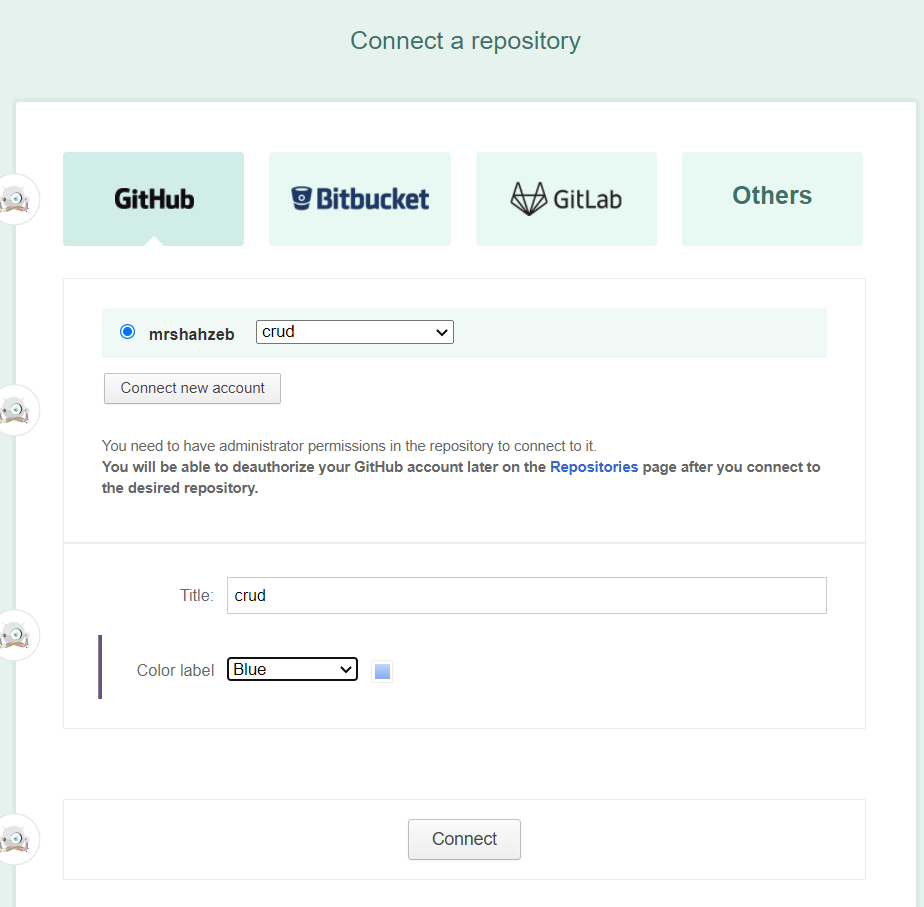
After creating a new DeployBot account or logging into your existing DeployBot account, click on “Connect a repository”.
Select the desired repository using the drop-down menu. If this is your first time connecting, you'll need to authorize access to your repositories.
Enter a title for this repository and apply a colour label, then click Connect.
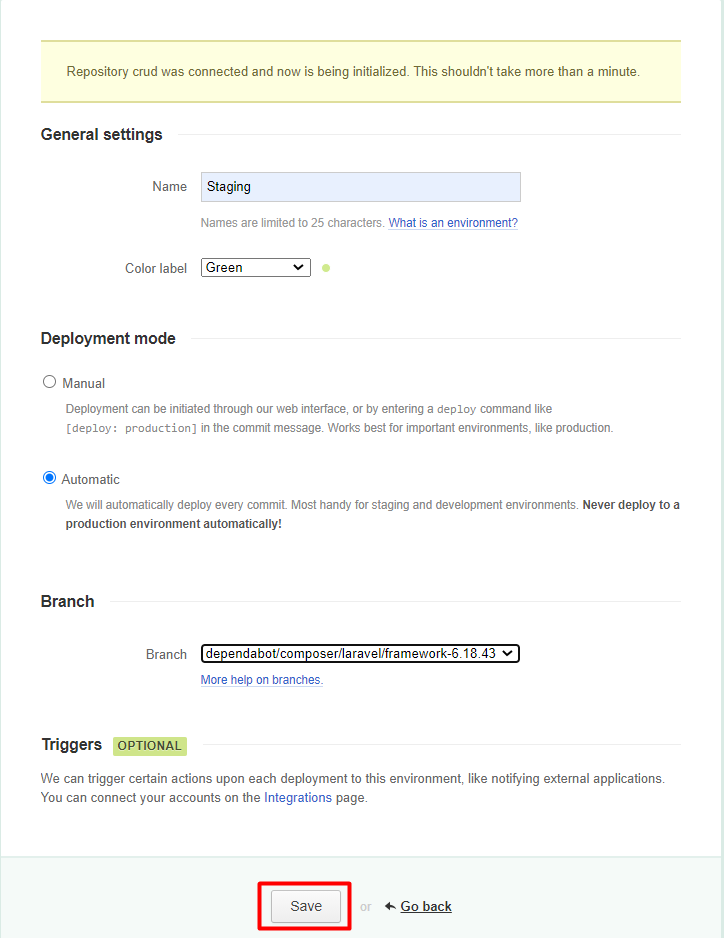
Configuring environment
The deployment will be manual, by default. However, you can change it to ‘automatic’ to start the deployment whenever a change occurs in your repo. You may also need to change “master” to your desired branch.
Configuring the server
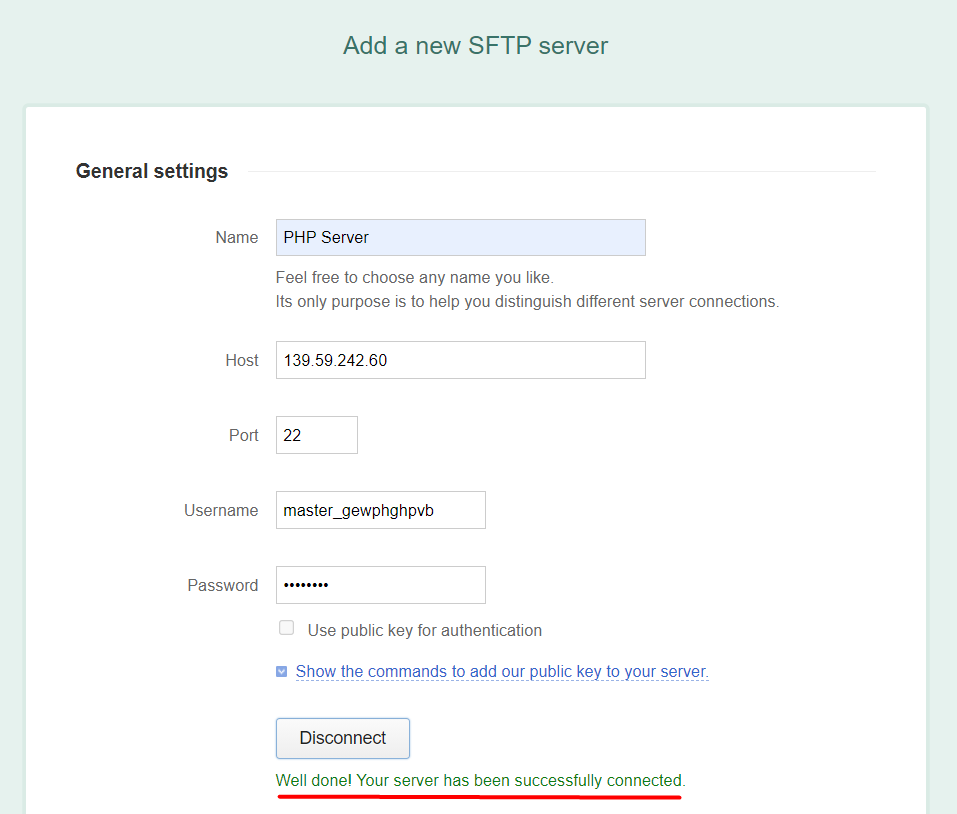
Select SFTP under the Files section.
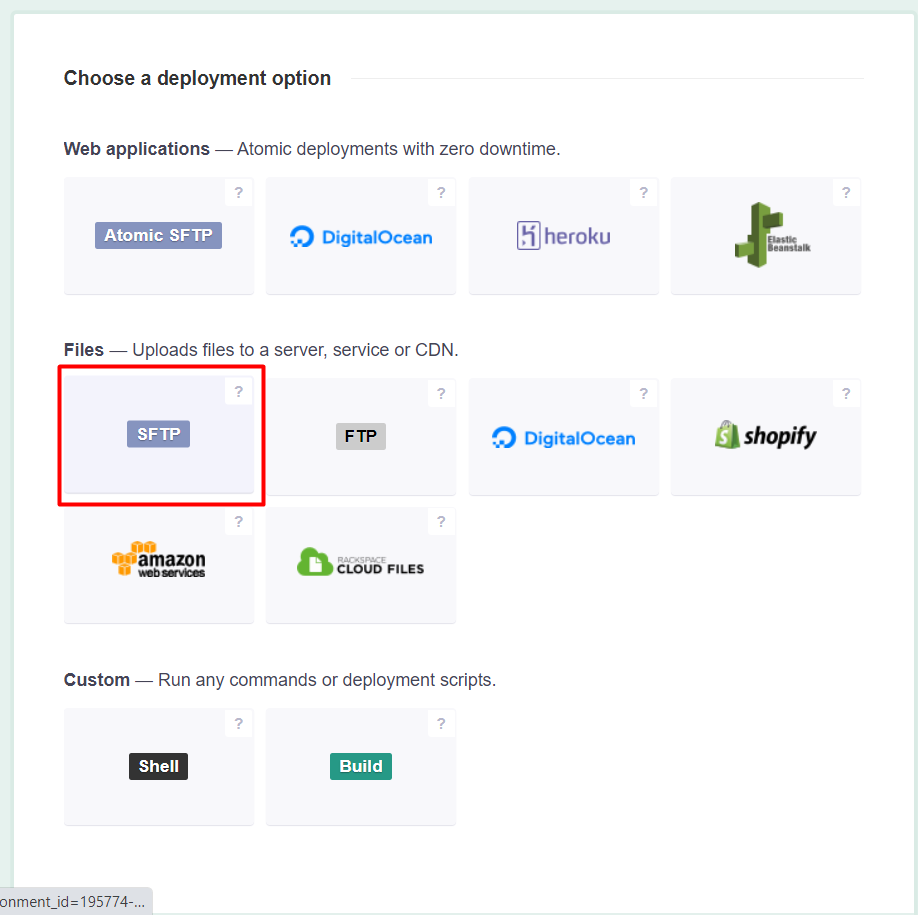
You can get the login credentials from the Master Credentials section within the Cloudways Server Console.
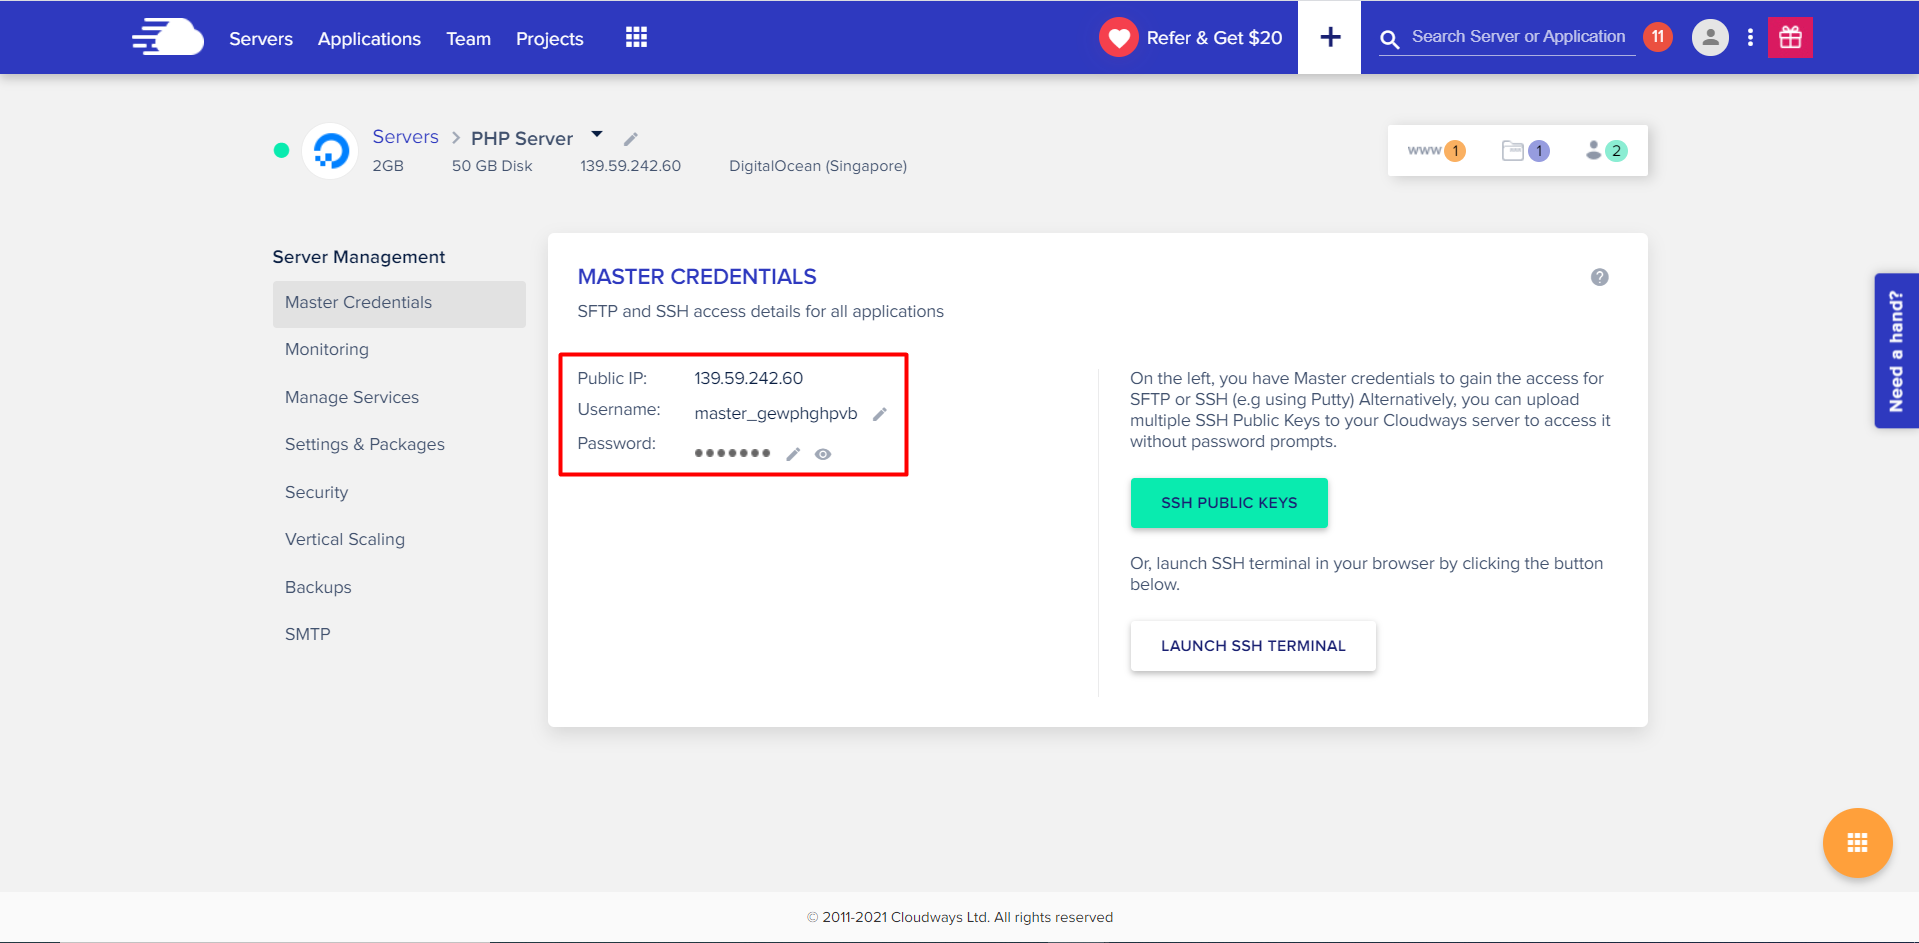
Enter the SFTP details into DeployBot:
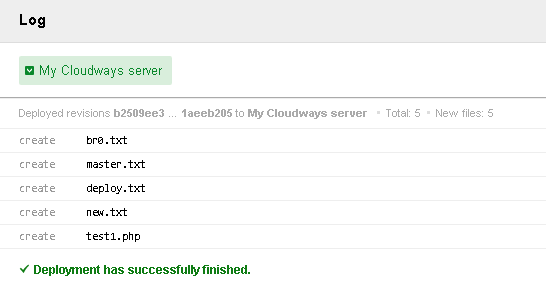
Navigate to Dashboard and click “Deploy”. Then, on the deployment screen, click “Start deployment”.
Wrapping Up!
That’s all you have to do to configure DeployBot with Cloudways and start compiling code! Make sure to utilize a smooth deployment workflow for your web applications, so you don’t have to push individual files after every update.
Other articles you might like
 June 13th 2026
Building a Production MCP Server in Laravel
Spec version notice: This article targets MCP specification version 2025-11-25. The protocol has sh...
 May 30th 2026
Evals in Laravel: How to Prove Your AI Output Is Actually Good
You shipped the ticket classifier last quarter. It works. The tests are green and they've stayed gre...
 April 28th 2026
Event sourcing with a little help from AI
Event sourcing in Laravel gives you a complete history of your domain, but the hardest part isn't wr...


The Laravel portal for problem solving, knowledge sharing and community building.